

We are going to look at how we can enrol iOS and iPadOS devices into Intune without having either Automated Device Enrolment (ADE), or Apple Configurator.
The reason for this? As we have discussed throughout most of these blogs, most companies cannot afford all the bells and whistles so there’s no point making guides that only apply to 10% of situations.
Without ADE or Apple Configurator you are more limited in available functionality, but as we have stated before, just because a security product has 1500 different settings does not mean you will ever be in a position to make full use of them. Remember, the best tool on the market is not necessarily the best tool for you.
Using this configuration method will require the download of the company portal app, and for the user to sign in using their company credentials. This method is primarily for BYOD devices, however if you have Intune, and don’t have any type of management in place for iOS devices then using this is at least a step in the right direction and when combined with MDE you can establish a decent level of visibility and control. With this method is it possible to mark the devices as corporate owned.
Where this option will really not work is if you are using a non-Microsoft MDM, so if you are using anything other than Intune or Microsoft Endpoint Configuration Manager this really won’t work for you.
NOTE: Microsoft provides a planning guide here which lists common considerations that you can use to assist with your deployment planning.
As we will be configuring iOS devices a prerequisite is an Apple MDM push certificate, and this will need to be created before we start our deployment. Let’s head over to the Intune portal and use the provided guide to get our certificate.
https://intune.microsoft.com > “Devices” > “iOS/iPadOS” > “iOS/iPadOS enrolment” > and you’ll see that only one option is available which is to create our push certificate.
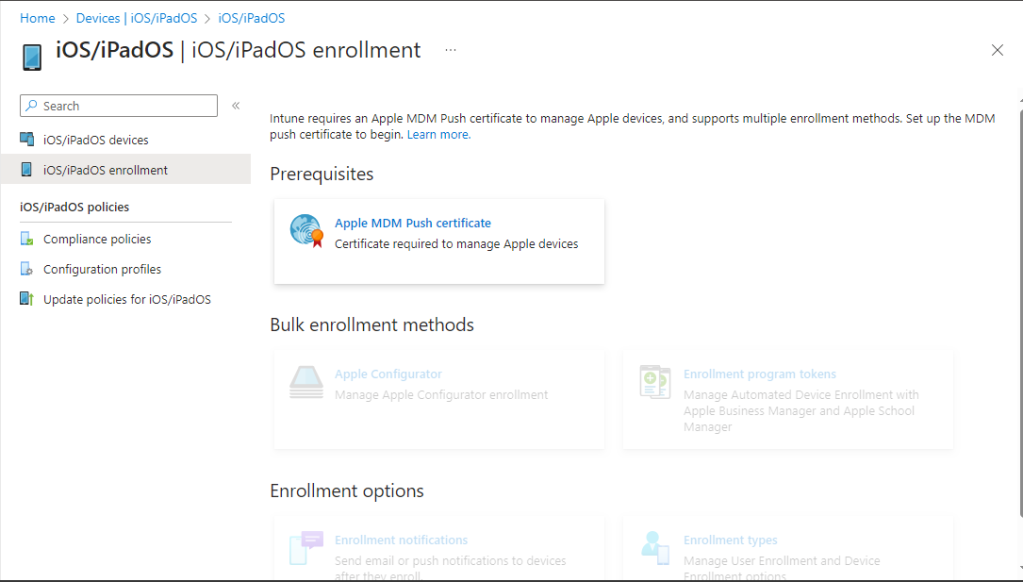
When you select this tile then you are presented with the guided setup.
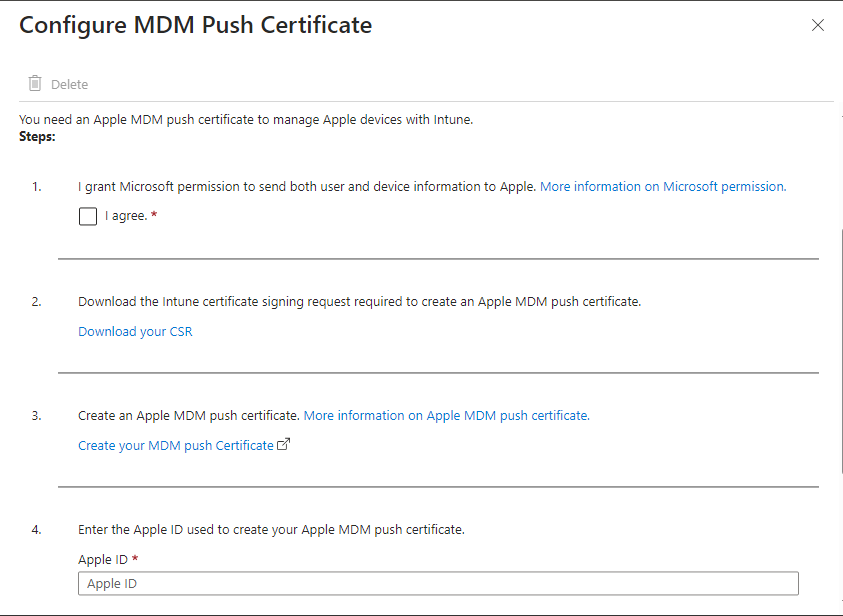
Agree to the T’s and C’s then download your certificate signing request in step 2.

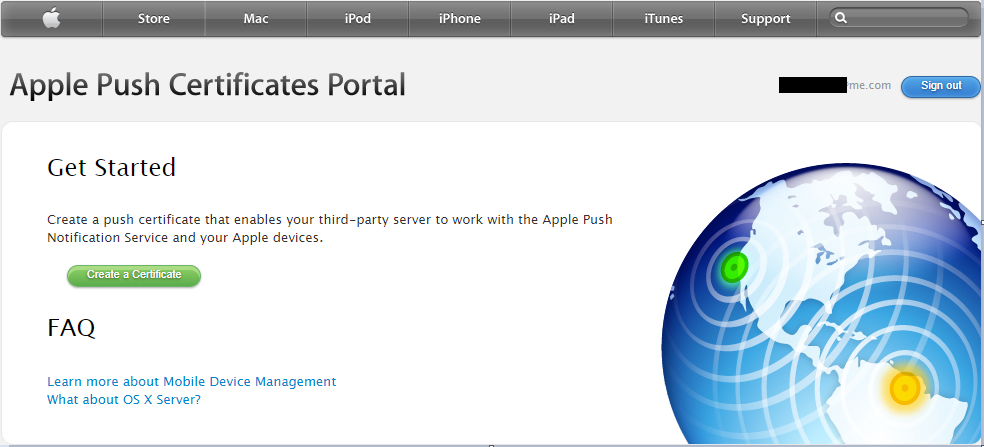
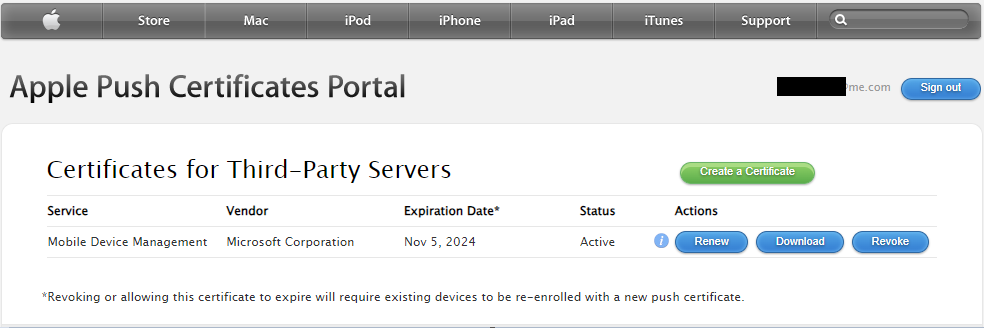
Now we need to login to the Apple portal using the provided link in step 3. We can use any Apple ID to create our certificate, but ideally we want to use a company managed ID so we don’t lose access to our certificate, and can manage it centrally with oversight. Once you have logged in with the selected account, and click on “Create a Certificate”.
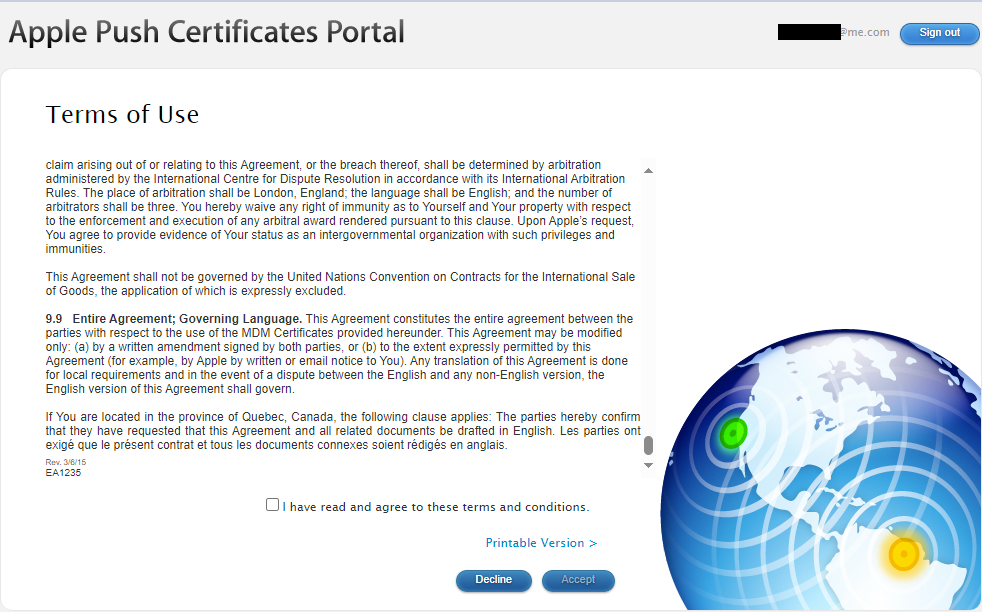
We then need to accept Apples’ T’s and C’s.
Now we move onto creating the certificate, we provide a description and then upload our downloaded certificate signing request (CSR file).

Our certificate is now created, we can download this to our laptop then upload to our Intune portal.
It will download as a “.pem” file.

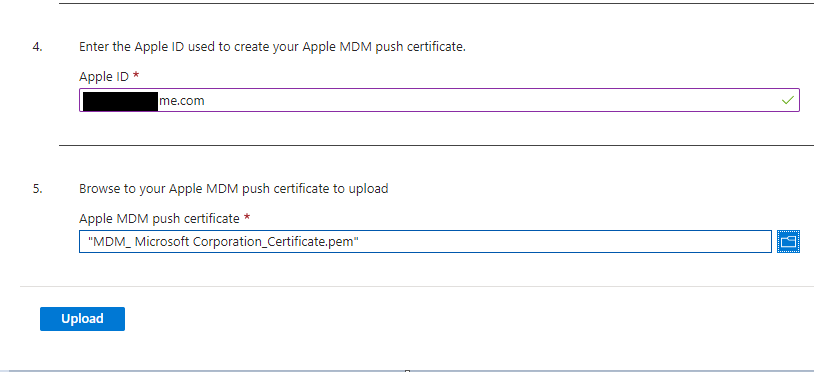
We need to go back to the Intune portal, enter the Apple ID we used to create our certificate and then upload our certificate (the “.pem” file).
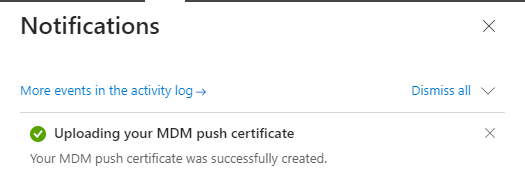
When the upload completes you should get a successful notification.
As soon as you have successfully uploaded the certificate and have received the “Successful” notification ensure you delete both of the downloaded files immediately, any copies you have made, and then empty your recycle bin. You want as few copies of these files as possible so you can account for all of them, and reduce any likelihood of the compromise of your certificate or key.
NOTE: Certificates are valid for 365 days and will need to be renewed, the Microsoft guide is here.
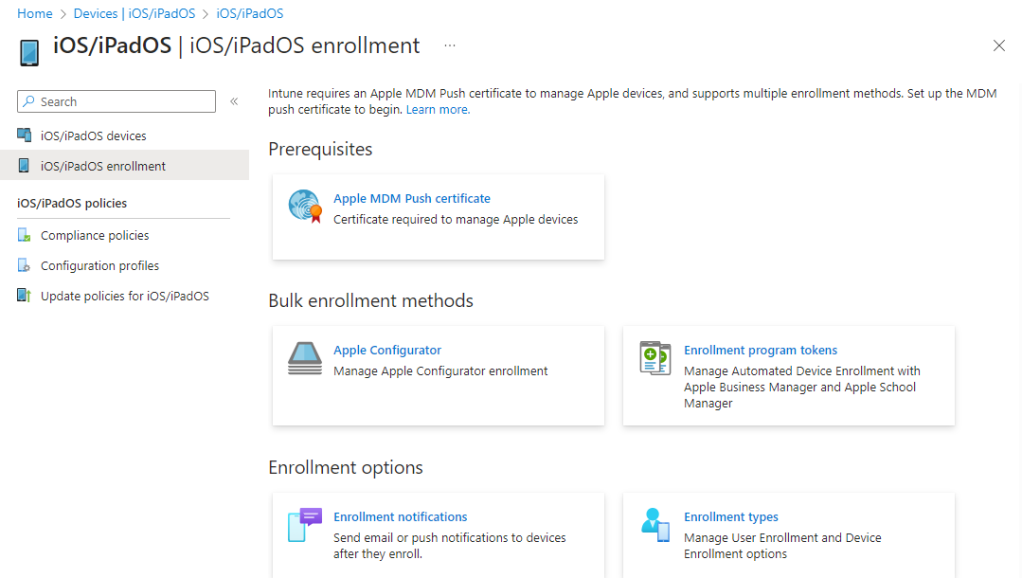
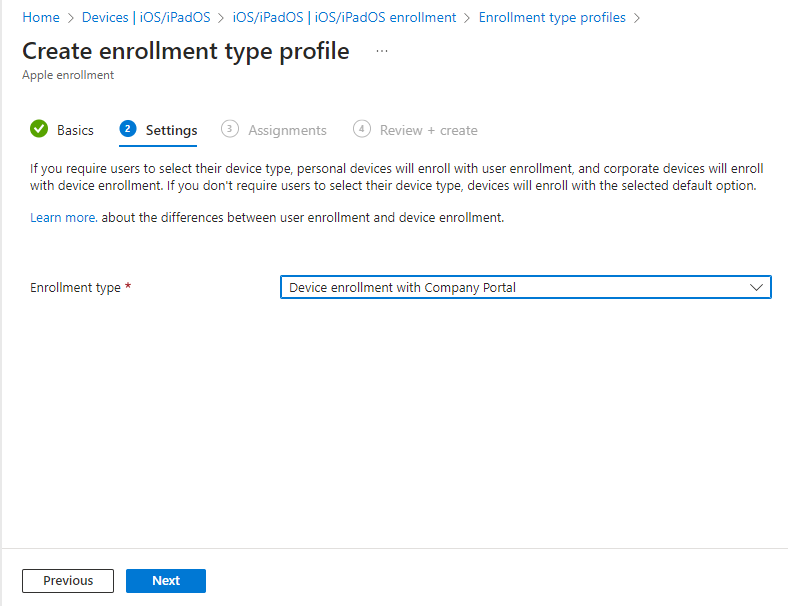
Now we have our MDM push certificate we can create our enrolment profile. We will be using device enrolment with company portal, this will require a user to be associated with the device, and that the OS versions for both iOS and iPadOS are 13.0 and later.
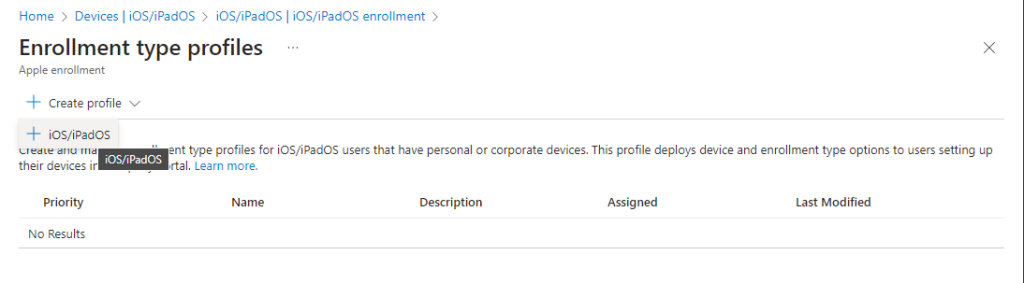
Now when we go to the same page at https://intune.microsoft.com > “Devices” > “iOS/iPadOS” > “iOS/iPadOS enrolment” > we will see the other tiles are now available.
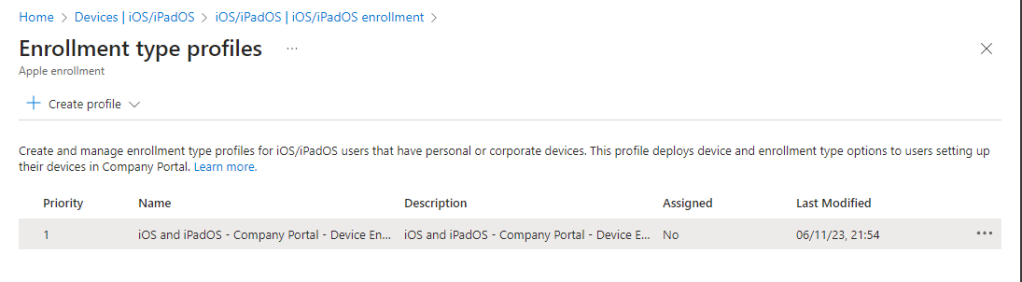
To create an enrolment profile, we chose the “Enrolment Type” tile and then select “Create Profile” as shown below.
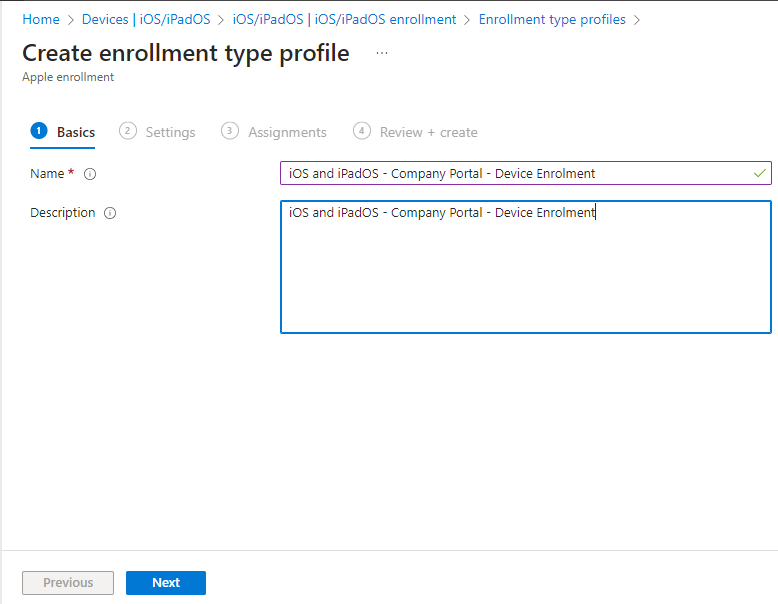
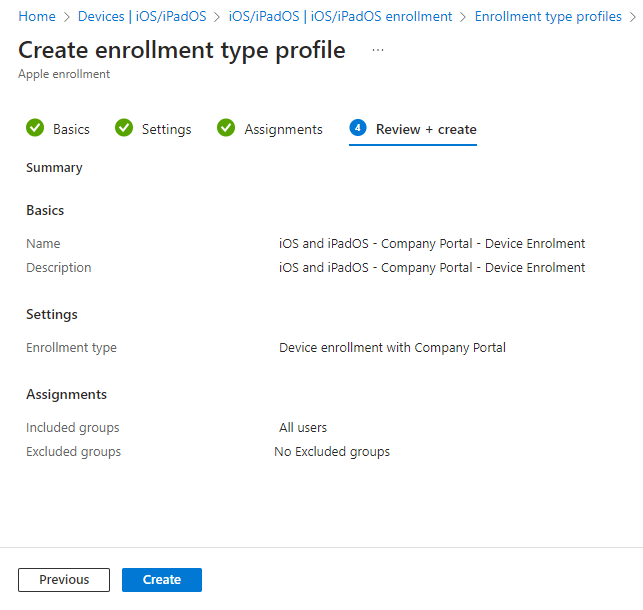
We give it a name and a description.
Our enrolment type is the option shown below.
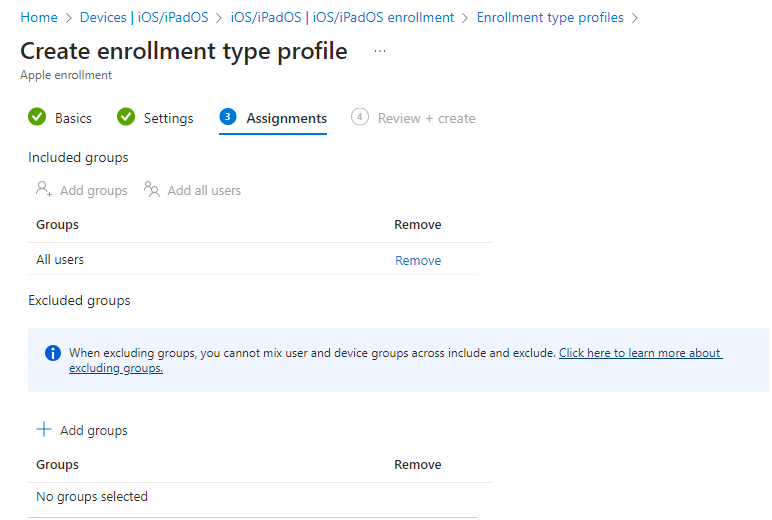
We assign this profile to “All Users”.
Let’s review and create our profile.
Once created we will see the policy in the enrolment types profiles page.
In the next guide we will create our configuration profiles.
